
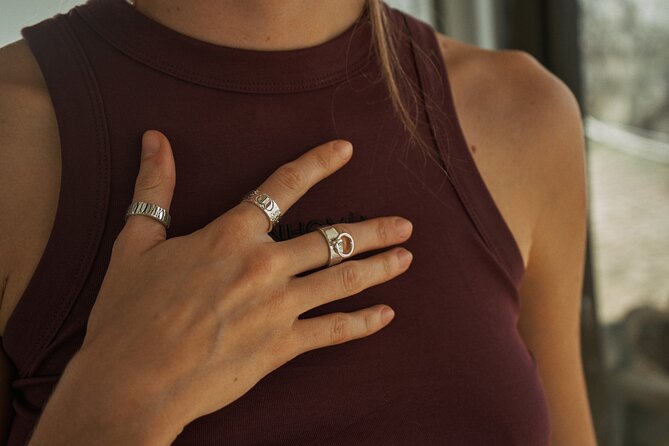
Reviewed · UBUD, MONKEY FOREST & CAMPUHAN
Ubud Town Center Silver Class – Create Your Own Silver Jewelry
Silver becomes jewelry in a few focused hours. In Ubud Town Center, this class lets you create your own ring, pendant, or bracelet in a small group capped at 14. You also get complimentary Wi‑Fi, so you can look up ideas and keep your trip plans handy while you work.
I like that the experience runs through the full process, from design choice to the final polish. You’re guided through melting pure silver into a bar, rolling and pressing it, shaping your jewelry, engraving details, sanding, then polishing until it’s ready to wear.
One thing to consider: your silver is capped at a final weight of 1–5 grams, and if your piece ends up under 5 grams, it’s still accounted for as 5 grams. Want more silver than that, and there’s an additional fee of 85,000 IDR per gram.
In This Review
- Key takeaways before you book
- Ubud Town Center timing: what the 1–3 hours really feels like
- Picking a design: patterns, sketches, and making it personal
- The silver-making steps: from molten metal to a finished piece
- Engraving and sanding: where patience pays off
- Polished and wearable: what you’ll take home
- Price and value: what $41.87 buys, and what it doesn’t
- Group size and comfort: why the class stays manageable
- Logistics that affect your day (without making it a headache)
- Who this silver jewelry class suits best
- Final call: should you book Ubud Town Center Silver Class?
- FAQ
- How long is the silver jewelry class?
- What can I make in the workshop?
- How much silver is included?
- What happens if my piece is less than 5 grams?
- Is there an extra charge for more than 5 grams of silver?
- Can I make more than one piece?
- Is Wi‑Fi included?
- Is transportation included?
- What is the cancellation policy?
Key takeaways before you book
- A max of 14 people keeps the pace comfortable and teacher attention more likely to stay with you
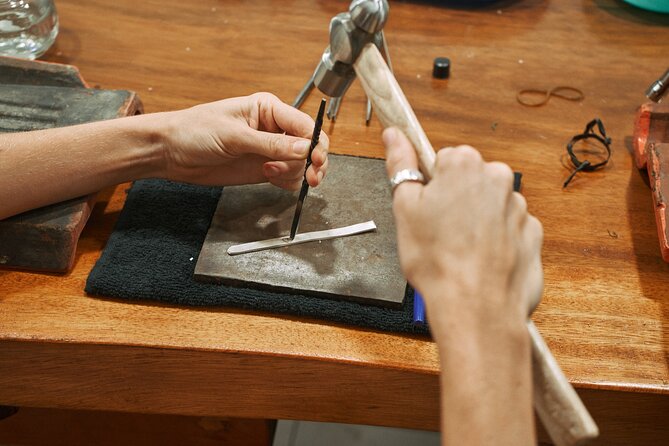
- Full making sequence includes melting, shaping, engraving, sanding, and polishing
- You get a one-piece souvenir you can wear, typically in the 1–5 gram range
- Free Wi‑Fi, snack, and mineral water are included while you work
- Extra silver costs if you go beyond 5 grams, so plan your design size early
- No shuttle included, so build in time to get yourself to Jl. Bisma in Ubud
Ubud Town Center timing: what the 1–3 hours really feels like
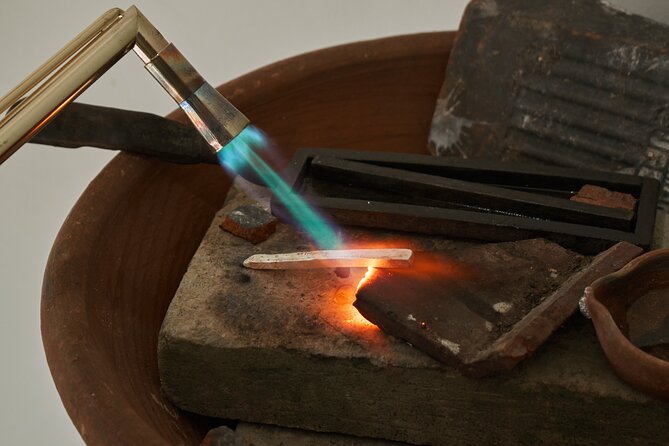
This is a hands-on workshop, not a quick demonstration. The class length is listed as 1 to 3 hours, depending on how complex your design is. In practice, that means you’ll spend a real block of your day working at your station, not just watching.
The session ends back at the meeting point, so you’re not left searching for a new drop-off. You’ll start at Ubud Town Center Silver Class, Jl. Bisma, which is a convenient area to build into an Ubud day plan. It also sits near public transportation, which helps if you’re using Grab or local rides instead of arranging a private pickup.
A practical heads-up: silver jewelry work includes fine handling and some physical effort. You should expect a bit of arm work and careful hand control during sanding and shaping, and the whole process can feel “tiring” in a good way if you like making things with your hands.
More around Ubud, from the Monkey Forest to the Campuhan ridge



Picking a design: patterns, sketches, and making it personal
Your first job is to decide what you’ll create. You can choose from available patterns and samples, or you may sketch your own design ideas. This matters because your final piece size and complexity affect how long it takes, and it also affects how the included silver weight lands.
The class supports a few common outcomes: a ring, pendant, or bracelet. If you’re nervous about designing, lean on the samples. The workshop experience is set up with examples that give you inspiration, which is especially helpful if you want something wearable but don’t know where to start.
Also pay attention to the “one piece only” rule. Each participant can make only one silver jewelry piece, and you can’t share silver with another person. If you’re traveling with someone and want matching souvenirs, you’ll each need your own creation rather than splitting the same material.
The silver-making steps: from molten metal to a finished piece
Here’s the part most people find surprising in a good way: you don’t just assemble something. You go through the making steps that connect raw material to a polished wearable.
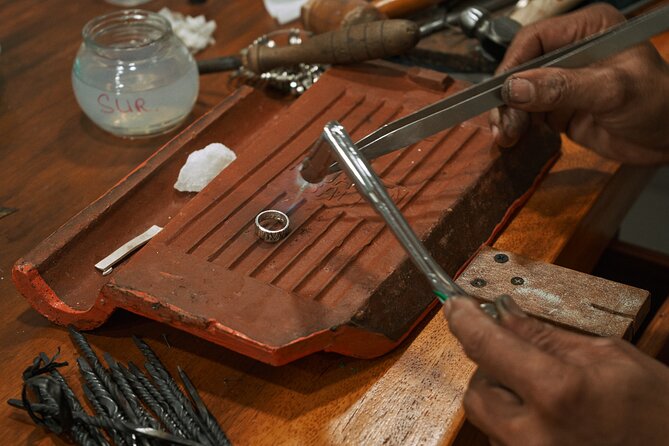
It typically starts with your chosen design, then the silver process begins. The workshop describes melting pure silver and pouring it into a bar. From there, you’ll work the metal into the thickness you need by rolling and pressing it. This step is why the class takes real time; it’s the foundation for the shape and durability of what you’re making.
Once the metal is ready, the shaping phase starts. Your jewelry could be a ring band shape, a pendant form, or the base for a bracelet style—whatever you chose early. Then comes engraving. You’ll add intricate detail to make the piece feel personal instead of generic.
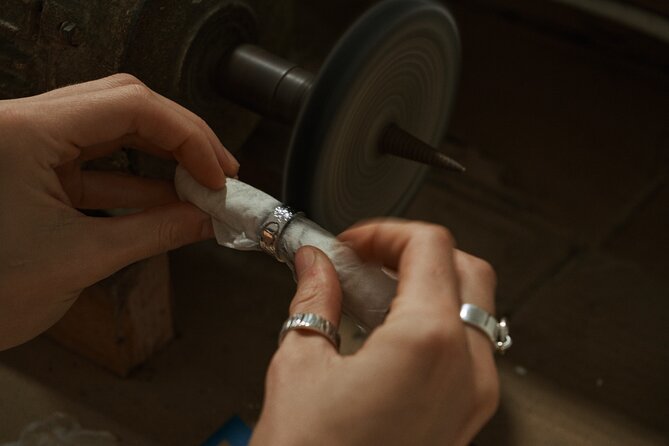
After engraving, you’ll sand the surface. This is where the work shifts from “making shape” to “refining the finish.” Sanding helps smooth out rough edges so the piece feels comfortable and looks clean in real life.
Finally, polishing brings the shine. The last step is what transforms a textured metal piece into something you’d actually want to wear around Ubud—during dinner, on temple days, or when you want a small souvenir that isn’t just sitting in a drawer.
Engraving and sanding: where patience pays off
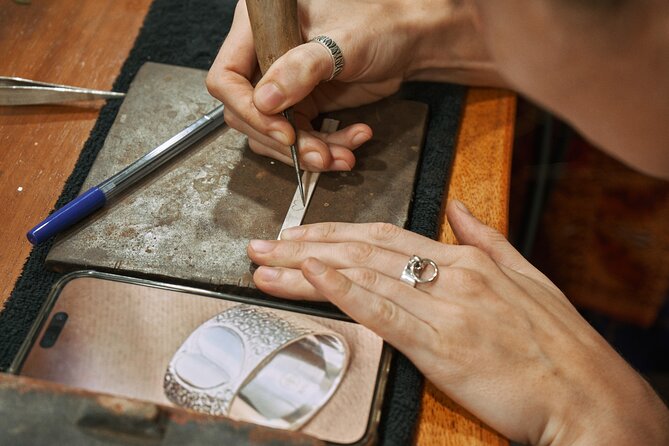
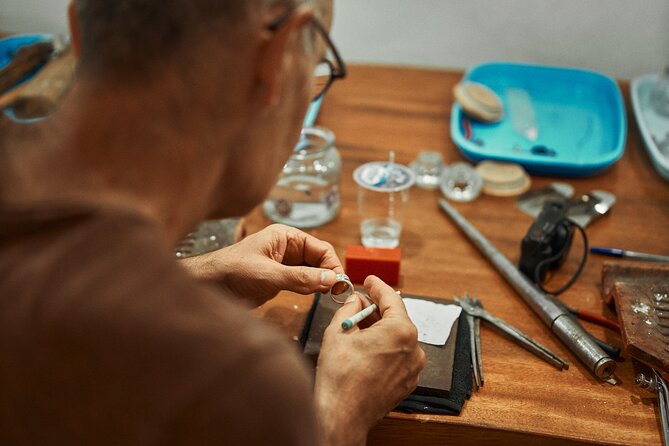
Engraving is where your design stops being a basic shape and becomes your signature. The class includes teacher assistance, which is key if your lines aren’t perfect at first. You’ll be learning as you go, and you’ll likely adjust your plan based on what the material allows.
Sanding is similar: it’s repetitive but important. The workshop process includes smoothing out rough spots, which makes a big difference to how the piece looks and how it feels. If you’ve never sanded metal before, plan for slower control rather than speed. Rushing is the easiest way to end up with uneven surfaces.
From the experience feedback, a patient teacher approach is a major reason people love this class. One review specifically called out Lau as wonderfully patient and skilled, and that kind of guidance matters when you’re trying to control fine details without feeling overwhelmed.
Polished and wearable: what you’ll take home
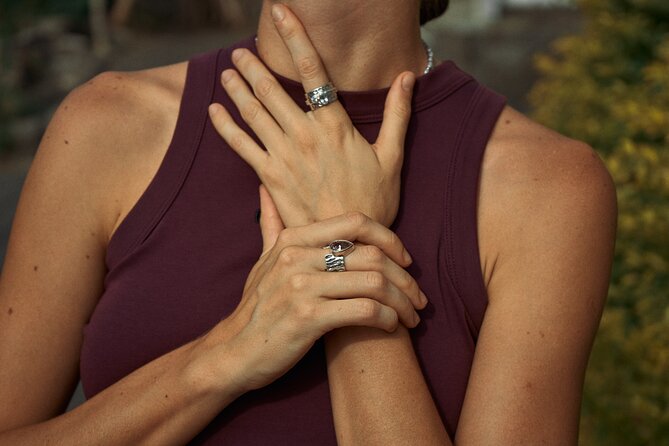
Your final souvenir is real silver jewelry made in the workshop. The included weight is described as 1–5 grams, with the exact final weight depending on your design. There’s also a minimum accounting rule: if your jewelry is less than 5 grams, it’s still counted as 5 grams for the class terms.
That “counted as” detail is more than fine print. It affects how you think about designing a small versus larger piece. If you want a bigger statement item, you may quickly reach the point where extra silver becomes necessary—and that’s where costs can rise.
The upside is that you’re leaving with something you can wear wherever you go. It’s not a postcard souvenir. It’s a piece you made through the process and can understand in your hands: you know why the thickness is what it is, and you know how the engraving got refined.
And yes, you’ll likely appreciate the difference between being the maker versus the buyer. The effort is part of the value here. When you make a ring or pendant yourself, you start to notice craftsmanship details you’d otherwise ignore.
More silver and jewellery workshops


Price and value: what $41.87 buys, and what it doesn’t
At $41.87 per person, this workshop competes well with the cost of just buying a finished small silver piece—especially because your class includes the process and supplies, not just the final object.
What’s included:
- Materials and tools for the workshop
- A snack and mineral water
- Free Wi‑Fi
- Teacher guidance through each step
- Your one silver jewelry piece (within the 1–5 gram range)
- Mobile ticket support
What’s not included:
- If you want more than 5 grams of silver, there’s an additional fee of 85,000 IDR per gram
- A shuttle service is not included, so you’ll need your own ride plan to reach Jl. Bisma in Ubud
So the value depends on your design. If you’re happy with a compact wearable piece, the price is straightforward. If you want a thicker band, a larger pendant, or multiple heavy elements, you’ll want to plan for the possibility of extra cost.
Group size and comfort: why the class stays manageable
A capped group size of 14 travelers is not just a number. It usually means you won’t be stuck watching from the back while everyone else works. Smaller groups make it easier for the teacher to check details and help you adjust when something isn’t going right.
Accessibility is also included in the experience details: the class is wheelchair and stroller accessible. Service animals are allowed, and it’s near public transportation. Those small practical points can matter more than you’d think when you’re deciding how to structure your Ubud days.
You’ll also get downtime support during the workshop. The snack and mineral water keep energy steady, and complimentary Wi‑Fi helps if you need a break to check directions or look up inspiration for what you want to wear later.
Logistics that affect your day (without making it a headache)
This experience runs from Ubud Town Center back to the same meeting point. That’s simple. The bigger question is how you’ll get there, since shuttle service isn’t included.
If you’re planning an Ubud day filled with temples, markets, and walking loops, you’ll want to treat this as a fixed appointment. A 1–3 hour workshop can be a great “anchor activity” because it gives your body a different rhythm than constant sightseeing. You’re sitting and working at a station, which can feel like a nice break from the heat and crowds.
Also, bring a plan for your belongings. You’ll want to stay comfortable and keep your focus on your piece. The workshop provides tools and materials, but you’ll still benefit from coming with the mindset of hands-on work rather than sightseeing mode.
Who this silver jewelry class suits best
This workshop fits best if you like practical, creative activities where you can actually take something home. If you enjoy small crafts, want a souvenir with meaning, and don’t mind detailed handwork, you’ll likely have a great time.
It’s also a solid choice for travelers who want a break from typical tours. You’re not just passing through a workshop floor with a quick stop. You’ll go step-by-step, from design to polish, which makes it feel more personal.
Who should think twice:
- If you only want a quick, low-effort activity, the making process can feel like real work.
- If you want a large silver statement piece, the included 1–5 grams may not satisfy you without additional cost.
- If you rely on a shuttle pickup for all activities, you’ll need to arrange your own transport to Jl. Bisma.
Final call: should you book Ubud Town Center Silver Class?
I’d book this if you want a wearable souvenir made with your own hands, guided by patient instruction, and you like the idea of learning the full craft sequence. The small group size (max 14), the included materials, and the step-by-step process make it feel worth your time and your money.
Skip it or rethink it if you’re aiming for a heavy silver design beyond the included weight. The extra fee for more than 5 grams (85,000 IDR per gram) can change the cost quickly. Also, if you’re not into hands-on work, you may find the class more tiring than relaxing.
If you do book, keep your design simple enough to match the 1–5 gram included range. Pick a style that’s easy to engrave and refine, and you’ll end up with a piece you’ll actually wear—because you understand what went into making it.
FAQ
How long is the silver jewelry class?
The class lasts between 1 and 3 hours, depending on how complex your jewelry design is.
What can I make in the workshop?
You can make one silver jewelry piece such as a ring, pendant, or bracelet.
How much silver is included?
You take home a piece starting from 1–5 grams, and the final weight depends on your design.
What happens if my piece is less than 5 grams?
If your jewelry is less than 5 grams, it’s still accounted for as 5 grams.
Is there an extra charge for more than 5 grams of silver?
Yes. There is an additional fee of 85,000 IDR per gram for more than 5 grams of silver.
Can I make more than one piece?
No. Each participant can make only one silver jewelry piece.
Is Wi‑Fi included?
Yes. Complimentary Wi‑Fi is included.
Is transportation included?
No shuttle is included, so you’ll need your own way to get to the meeting point in Ubud.
What is the cancellation policy?
You can cancel for free up to 24 hours in advance for a full refund. Cancel less than 24 hours before the start time, and the amount paid is not refunded.
More Bali Reviews & Picks



More Silver & Jewellery Workshops
More Around Ubud & the Monkey Forest

Still deciding? More Bali days reviewed, from volcano sunrises to island crossings











Ubud, Monkey Forest & Campuhan, compared.
 ★ 5.0All-Inclusive Ubud Private TourFrom $10014,344 reviews
 ★ 5.0Best of Ubud Full-Day Tour with Jungle SwingFrom $568,571 reviews
 ★ 5.0Ubud: Monkey Forest, Jungle Swing, Rice Terrace, and Water TempleFrom $317,160 reviews
 ★ 5.0Best of Ubud 1-Day Private TourFrom $544,451 reviews
 ★ 4.4Ubud Palace Legong Dance Show TicketFrom $63,979 reviews
 ★ 5.0Body Massage Experience in Ubud Traditional SpaFrom $213,506 reviews
 ★ 4.4Ubud Kecak and Fire Dance Show TicketsFrom $62,631 reviews
 ★ 5.0Ubud Cooking Class Bali with Balinese ChefFrom $351,609 reviews
Browse the lists this tour appears in